
DIY Glow in the Dark Lanyard Beads

Are beads and lanyards still a “thing”? They sure are, if you ask me, I have them on most of my knives, flashlights and key rings, but instead of just being decorative I like things to be practical too, like “find your flashlight in the dark” and “don’t loose your pocket knife while night fishing” kind of practical.
Yes, we are going to make glow in the dark lanyard beads, in case it wasn’t obvious from the title.
Materials and Tools I Used

- Glow in the Dark powder – do your research and buy the best quality you can afford
- Epoxy Resin – I used Devcon 2 Ton
- Packing Tape – at least 5cm (2 inch) wide
- Piece of wooden board – preferably hardwood and not thicker than 5mm (0.2 inch)
- Sandpaper – I used Grits 120, 220, 500
- Wood Finish – I used Boiled Linseed Oil
- Saw – I used a Hacksaw
- Drill and Bit – 2 and 5mm
- Vise – will make your job much easier and safer
- Ruler
- Pencil
Preparing the Board


Because it’s impractical to make the beads one by one, I made them in batches, for this I cut out two pieces of board about 6x4cm (2.4×1.6inch) making sure the cuts were as straight as possible; then I sanded the pieces a bit to remove the raised grains.
The next step was to unroll a piece of the packing tape, approx. 20cm (8inch), put it sticky side up on the workbench, then I placed the two pieces of wooden board, I previously cut, on it. The wooden pieces need to be placed at the middle of the tape leaving a distance between them; the distance between will become the glow in the dark part of the bead.
Finally I wrapped the tape around the boards so that it completely sealed three sides, then I trimmed the excess.
Mixing and Pouring the Epoxy


Knowing the size of the beads I wanted, I calculated the amount of epoxy resin I needed for 8 beads and then I mixed some of the glow in the dark powder with part A of the resin and some with part B, when the two mixes were homogeneous I mixed them together. Next I poured the resin between the pieces of board prepared in the previous step.
Few thoughts on epoxy resin and glow in the dark powder.
Or better said why I chose Devcon 2 Ton: long working time, totally transparent, strong, thin enough to pour. Unfortunately I’m not sponsored by Devcon so I can tell you that there are other brands that have the same features (some for less money).
The glow in the dark powder is a bit tricky because I can’t give you a brand name or link, but you are looking for the highest quality you can get your hands on and afford. By high quality I mean long glow time and high intensity glow; look for that in the reviews, rather than product descriptions.
Shaping the Lanyard Beads


Once the epoxy resin fully cured, I trimmed the edges of the piece using a hacksaw whilst I made sure to cut off just enough material to be left with a piece of 5×2.5cm (2x1inch) about right for 8 beads.
Next I marked 8 1.2×1.2cm (0.5inch) squares and cut them out with the hacksaw, I prefer the hacksaw over a regular handsaw because it has a cleaner cut, handsaws tend to rip out fibers from the wood.
After drilling 2mm (0.08inch) pilot holes trough the center of every piece I started shaping them on coarse sandpaper (grit 220), once they were approximately round I drove a large screw trough the pilot holes so that I can mount them in a vise for further shaping.
As soon as I was happy with the shape and size of the resulting beads I polished them with grits 120 then 500.
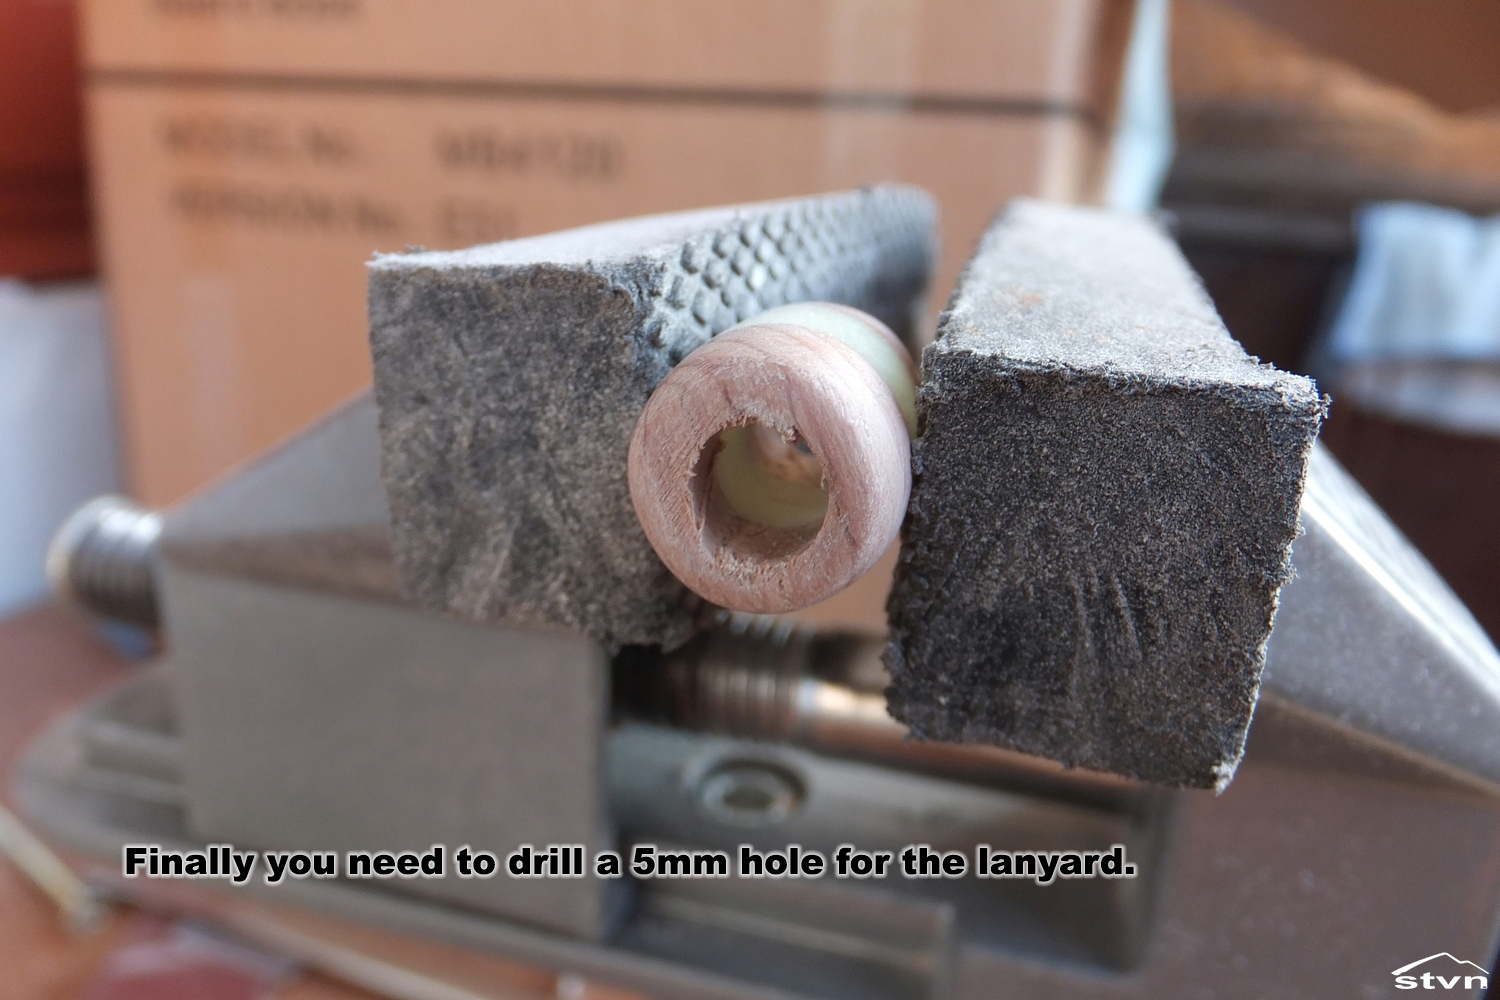
The final step was to drill a 5mm (0.2inch) hole through every bead, for the lanyard and sand the edges of the hole.
Finishing touches


Of course I could have used the beads as they were, but I dyed some of them (even with permanent markers) to match the lanyards and items they were meant for; some I left undyed, then I applied boiled linseed oil as finish on all of them.
That’s it, have fun making and using your own glow in the dark lanyard beads!
You might read these too


